Month: October 2010

  • Andi’s Challenge

    Warning: DO NOT try this at home.  It is never smart to binge drink, no matter who you are or why you’re doing it.  Always drink responsibly, know your limit, and don’t drink and drive.
     

    Andi.  What a lady.  She is a dear friend and a fellow lover of the drink.  She’s also an instigator, and often of things that I somehow already want to do.  Things such as drinking a shot of all the liquor she and Matt have in their house, and reviewing them for the website (in one sitting).  Oh yes. I’m not kidding.  She’s an evil one.  But, I am also not one to turn down a challenge when it involves drinking on a Sunday, or my website.

    So I accepted.

    As it turns out, they had ten bottles of booze of which Andi deemed fit to feed me a shot, so she made up a chart of each kind, filled up the shot glasses, and sat a tray of booze in front of me.

    Yeah, it didn’t sound or look (or smell) good to me either.

    I was to take notes for each shot, and not only review them, but try to record and see how the drinking affected my reaction to each liquor.  Here are my notes – pregame.

    “I am about to embark on a challenge like never I’ve done before.  I’m frightened and a little hesitant, but it’s Sunday, and Andi’s making me.  The challenge is to drink a shot from each bottle in the Ponkey’s liquor collection, and record my thoughts on each.  I will not be telling this story.”

    Clearly I’ve changed my mind.

    I prepared myself for the worst, since this was not going to end well no matter what.  I had tons of water and plenty of chasers to sooth me after the rough shots, and three people watching me in case it got to be more than I could handle.  I was also in walking distance of my home, and was allowed to stop whenever I wanted to.

    My shot list (in order of how I drank them)

    • Raspberry Di Amore
    • 101 Proof Peppermint Schnapps
    • Kahlua
    • Jagermeister
    • Smirnoff Vodka
    • Don Julio Tequila
    • Jim Beam Bourban
    • Blanton’s Kentucky Whiskey
    • Jack Daniels Special
    • Licor 43

    Each shot was in a 1.5 oz shot glass and ran the gamet from a low 40 to 101 proof.  Thankfully, gin was not included in this experiment, and honestly, I wouldn’t have touched it anyway.

    It took just under two hours to complete the challenge, which stopped being truly scary after the first shot and only got easier after that.  After the first two shots, I requested that everyone else have a beer or cocktail so I wouldn’t be the only person drinking, and they all agreed, thank goodness.

    After four shots, I spilled my orange juice everywhere.

    After five shots, I’d started to question why we were doing it, and apparently this was the reaction:

    “Andi assures me that she only poured the shots.”

    Liar.

    And then, one shot later, I was all right with all of it, and gung ho to keep going.

    “I’m beginning to get so drunk that I’m thinking I should take both whiskey shots back to back.”

    By this I meant to drink one immediately after the other.  I didn’t.

    I think it’s important to note here that for the whiskey shots, my “reviews” are unreliable.  “Horrible” and “It’s Jack” are not viable or helpful to anyone.

    After eight, I stopped being able to count. I had also become completely irresponsible (as if this whole challenge was an act of good choices).

    “I am pretty drunk now.  Six shots in, and I’m actually disappointed that I only have 2 shots left.  I will probably ask to go to the liquor store later.”

    Wow.  So proud of myself.  (Not)

    However, after 10 shots, drunk me was very proud.

    “I just did 10 shots in two hours.  I did it and I am happy.  I am very proud of being able to last for 10 shots.”

    And so, that was the experiment.  After ten shots, I ended up with eight real reviews that I am not going to publish today.  However, over the next week or so I will periodically release them to keep you entertained.

    For now, I’d like to take some time and forget the rest of that night, which as you can imagine, was hilarious beyond measure. But that’s another story.

    Copyright of Drinkmatron.com.  Contact website admin to obtain permission for republication.
  • Introducing Whipped Lightning!

    Just when you were sure they couldn’t get any more creative with our alcohol choices, a revolutionary idea like this lands on our doorstep.

    Ladies and gentlemen, I’d like to introduce to you, Whipped Lightning!

    What, you ask, is this whipped lightning?

    Well kids, it’s alcoholic whipped cream.  They’ve even given it a name – Whipahol.  And with flavors like strawberry colada, amaretto, white chocolate raspberry, spiced vanilla, tropical passion, and coconut, it’s bound to be the “next big thing” in alcohol consumption.

    Imagine what your life would be like if you could add alcohol to anything that you can put whipped cream on!  Ice cream, pie, and hot chocolate would all become even more interesting.  There’s bound to be a bevy of new recipes that will include the new creation, teaching the world just how much we Americans like our fast, easy, and undetectable booze.  And we’ll drunkenly laugh while the world shakes its shameful head at us.

    Unfortunately this fantastic creation is not available in all 50 states yet (like Indiana), but if you’re lucky enough to live in a place where you are able to buy it, go out and pick up a can and start creating!

    For more information on Whipped Lightning Whipahol, check out their website.

    Copyright of Drinkmatron.com.  Contact website admin to obtain permission for republication.
  • Brewing Mead Part #3: Fermentation

    Mead Series by Mead Extraordinaire, Matt Ponkey

    Once you’ve prepared your must, you should start seeing fermentation with 24-48 hours.

    Fermentation

    Fermentation is the basic process of yeast turning sugar into ethanol & carbon dioxide.

    The basic reaction for fermentation is:
    C6H12O6 → 2C2H5OH + 2CO2

    Glucose (sugar) is represented by C6H12O6, Ethanol (booze) is represented by C2H5OH, & Carbon dioxide is represented by CO2

    What this basically means is for every 1 part of sugar, the yeast churns out 2 parts ethanol and 2 parts carbon dioxide gas.

    Yeast

    Yeast comes in two forms.  Naturally occurring yeast, like the kind found in most fruit juices, and synthetic yeast.  The best example of natural yeast is the kind that forms from leaving a gallon of apple cider in the fridge for a month or two.  Synthetic yeast is used to make wine, mead, or beer, and is much more stable than natural yeast.  Alcohol can still be produced from natural yeast, but it is more susceptible to bacterial contamination.

    Sugar

    Glucose, or sugar, is the main ingredient for fermentation. In traditional wine making, grapes are used as the primary source of sugar. The grapes are crushed to release the juices stored inside them, which are rich in natural sugars. Different grapes produce different flavors and variations within the resulting wine. Riesling grapes produce a sweet, white wine, because they are a sweet white grape. Syrah or Shiraz grapes produce a dark, dry red wine due to their coloring & sugar content.

    In mead, the process is almost identical. Honey is used as the primary source of sugar, so the type of honey you choose will have a major effect on how your mead tastes in the end. For example, I am using an Orange Blossom Honey, which is harvested from bees that primarily pollinate around Orange Groves in Florida. This honey should produce a mild orange flavor in the resulting mead.

    Temperature

    In reaction chemistry, the hotter the environment, the faster the rate of reaction. The best and easiest example I’ve found is dissolving sugar in water. What dissolves the sugar quicker, hot or cold water?  For anyone who drinks coffee or tea, the obvious answer is the hot water. The heat of the water increases the rate at which the sugar dissolves into it. The same principal stands for chemical reactions.

    This raises some important points. Previously I had mentioned that you should keep your mead in an area between 70°F-75°F. This was the proper temperature for the yeast strains I was using, however just like people, different yeasts prefer different temperatures. For example, some yeasts prefer a temperature range of 64°F – 68°F, which is too low for the strain of yeast I used. The important thing to remember is that the higher the temperature of your mead, the quicker the fermentation reaction occurs. Although this can increase rate of fermentation, potentially speeding up the overall process, try not to raise the temperature on your mead is too high. This can work the yeast so hard that it will die prematurely, cause such rapid fermentation that will break your airlock, or worse yet, foster bacterial growth within your mead.

    Bacteria

    Bacterial contamination is one of the greatest threats to your mead. Bacterial growth, at any stage, can easily ruin a batch, however if it occurs during fermentation, failure is almost guaranteed. The best way to prevent bacterial contamination is proper sterilization of equipment and working areas during all stages of brewing.

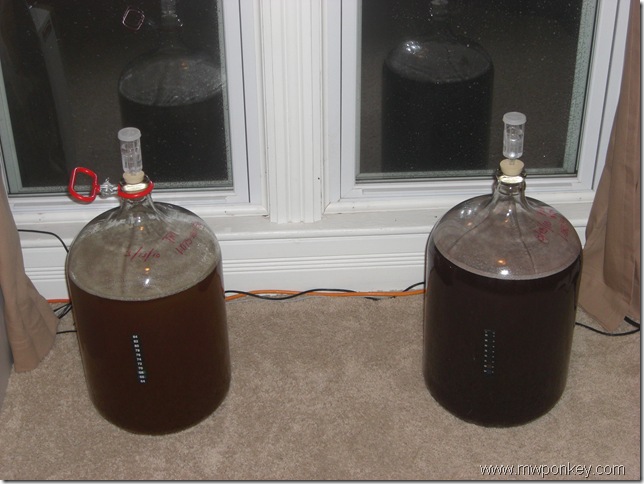
    In the end, keep a close eye on your mead throughout the fermentation step, as it is probably the most critical to the success of your mead. The best way to tell if fermentation is complete is to look at your airlock. When it’s complete, no more carbon dioxide will be produced, so you won’t see anymore bubbles coming through your airlock. If you have a glass fermentor, it’s very easy to tell if your fermentation is complete simply by looking at your mead. During fermentation, you should see very small bubbles rising to the surface, and the surface of the mead should be a frothy mess of bubbles. After fermentation is complete, the bubbles will no longer rise to the surface, and the surface will be completely still. If you bump your fermentor and see any activity or bubbles, this does not mean you restarted fermentation, it only means that you released some trapped carbon dioxide.

    As always, if you have any questions, feel free to email me.

    Best of luck!

    Used with permission from Matt Ponkey.  You can find the original post at http://www.mwponkey.com/2010/10/brewing-mead-part-3-fermentation.html. Contact the author to obtain permission for republication.
  • Drink Matron Birthday Beer Review

    Good Tuesday All!

    This weekend was quite an interesting one.  I had been feeling pretty bummed out about turning 30, and had done a sort of campaign to get people to come down to Indiana and celebrate with me.  While I didn’t succeed in getting all the people that I’d hoped, I convinced enough to celebrate with me that we had a nice little group consisting of Adrian (of course), the Ponkeys, our friend James, and his lady friend Erica.

    From left to right: Andi, Erica, James, Matt, Adrian

    What this weekend was not – a pity party for the good old Matron.  By the end of it, I forgot it even was my birthday, let alone what number it was.

    What this weekend was – a celebration of good friends and a reminder that I am still quite young for my age – especially when it comes to drinking – but adult enough to handle myself with dignity, even when I’ve had more than my fair share to drink.

    Along the way, I discovered a few interesting beers that I didn’t know existed, my favorite being Monty Python Holy Grail Ale by Black Sheep Brewery.  It’s just a standard ale, but COME ON!  Anything with Monty Python on it is worth keeping a case of.

    Yes, that's right. Monty Python Holy Grail Ale. It's real.

    I asked everyone to give me a short review of some of the beers they were drinking and this is what they came up with.

    Pyramid Breweries Apricot Ale

    Andi says: I didn’t expected it to be such a girly beer, but it’s very nice.  Subtle.

    New Holland Dragon’s Milk

    We all tried this beer, but Adrian slowly sipped this 10% abv Scotch Ale for about an hour, longer than I’ve ever seen him take to drink anything…ever.

    He says: Very heavy. It’s extremely thick and potent. Terrible to drink with a meal (which he did).

    Thicker than Guinness, Dragon's Milk tastes like creamy caramel

    Guinness

    Matt says: Best winter beer ever.  It’s like slamming milk.

    Sam Adams Cherry Wheat

    Andi says: It actually has a real cherry flavor that takes the beer taste away.  I would most definitely recommend it to someone who doesn’t like beer.

    Other beers that we tried that night (but had gotten too, um, unreliable to review) were:

    Abita Brewing Co. Turbodog

    Three Floyds Robert the Bruce Scottish Ale

    And New Holland’s Mad Hatter IPA

    Overall, we had an amazing time, and added quite a few new beers to our repertoire.

    If you think we’d really enjoy a specific beer, or you’ve found something that you’d like to see on Drink Matron, please contact us at beer@drinkmatron.prjct.info.

    Copyright of Drinkmatron.com.  Contact website admin to obtain permission for republication.
  • Who’s this Drink Publican?

    In case any of you were wondering who it is, Adrian has changed his name on the website to Drink Publican.  No, this is not a political statement. It is a term most commonly used in Great Britain and Ireland, referring to the owner or manager of a tavern or public house (pub).

    The job of the publican is to make sure that the overall tavern experience is an enjoyable one, providing a happy and comfortable atmosphere. As our website administrator and designer, the term fits Adrian’s role pretty splendidly.  If it weren’t for him, well, let’s just say the site would not be pretty.  He’s also the most lighthearted person at DM, and he certainly makes life in general a lot more fun.

    Copyright of Drinkmatron.com.  Contact website admin to obtain permission for republication.
  • Brewing Mead Part #2: Starting Your Mead

    Mead Series by Mead Extraordinaire, Matt Ponkey

    So, as I stated at the end of my last post, the two types of mead I will be brewing are a Traditional style, and Melomel style.

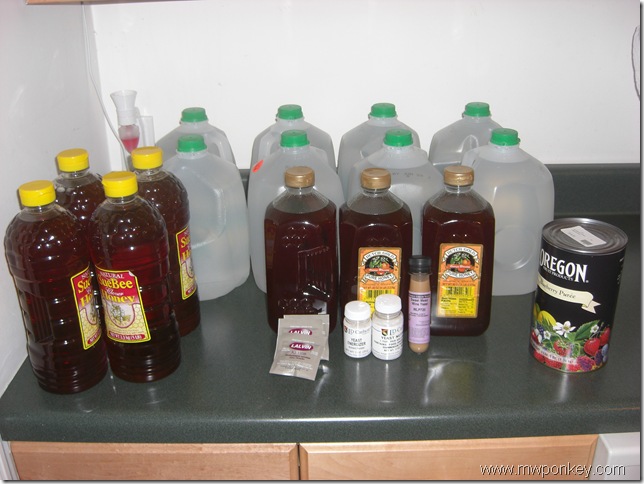
    The recipes are:

    Traditional Mead

    • 4 Gallons of Distilled Water (not drinking water, I’ll explain that later)
    • 15 lb Orange Blossom Honey
    • 1 vial of White Labs WLP720 Sweet Mead/Wine Yeast
    • 4 Tsp. Yeast Nutrient
    • 4 Tsp. Yeast Energizer

    Melomel Mead

    • 4 Gallons of Distilled Water
    • 18 lb Clover Honey
    • 3 Packets of Lalvin K1V-1116 Montpellier
    • 1 Can of Blueberry Puree
    • 4 Tsp. Yeast Nutrient
    • 4 Tsp. Yeast Energizer

    The Ingredients

    Other equipment used:

    • Two (2) 5 Gallon Glass Carboy’s with Handles
    • One (1) 5 Gallon Bucket for Sanitizing
    • Two (2) Size #7 Rubber Stoppers with Two (2) Air Locks
    • Electric Drill
    • Plastic Agitator
    • LD Carlson Easy Clean
    • Wine Thief
    • Hydrometer

    So now we have our ingredients and our required equipment.  The first and most important step…and I mean…the MOST IMPORTANT step, is the sanitizing of your work area and equipment. I usually start by putting down one of those cheap plastic painters tarps (the throw away kind, trust me, its worth the extra $5), and then set to work sanitizing my equipment.

    This is where the Easy Clean comes in. I prefer Easy Clean because, unlike traditional sanitation methods, it’s pretty impossible to mess up. For example, you can boil your equipment, but that would destroy some of it, and just be overall a pain in the ass. You could use a bleach solution, but you have to make sure you mix it correctly and rinse very thoroughly, otherwise you can taint your mead.

    With Easy Clean, you mix to the directions on the side (1 Tablespoon per gallon of hot water) but as long as you don’t mess it up too bad, it’s no big deal. Then you just swirl it around your carboy jugs and soak you equipment in it and…BAM! Sanitized. No rinsing required.

    Once all your equipment is sterilized, take a minute to wash & sterilize your hands, and you will be good to go.

    Let’s Make Some Mead!

    Now that your equipment is prepped, you can actually start putting together your mead.

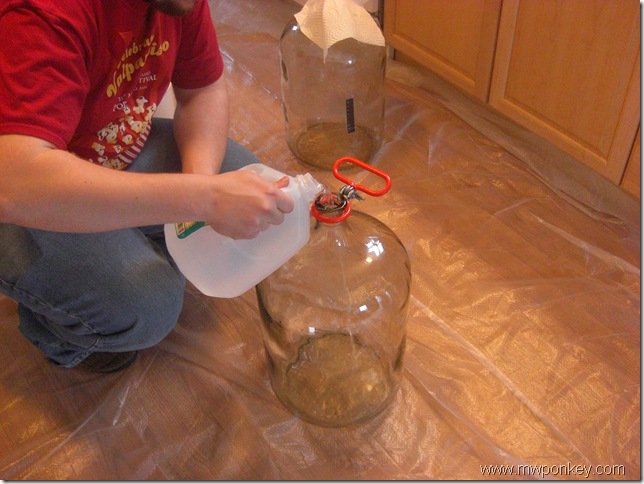
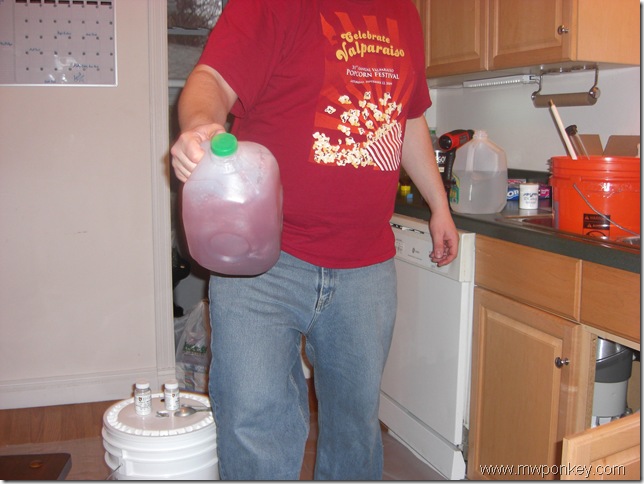
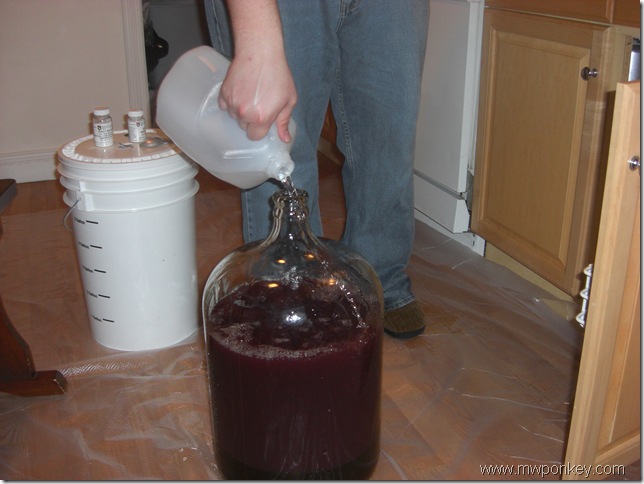
    Step #1: I like to start by putting 1/2 of the water in the jug (as seen below) because it prevents the honey from sticking to the bottom of the carboy. Use distilled water, not drinking water, because drinking water contains minerals to give it a better taste when drinking; however these minerals can also taint the flavor of your mead, so make sure it’s distilled.

    Adding your distilled water

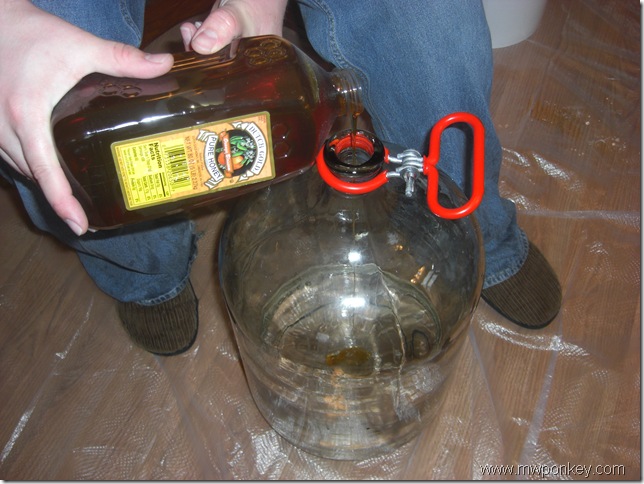
    Step #2: Once you have your water in the carboy, you can begin adding your honey.

    Adding the Honey

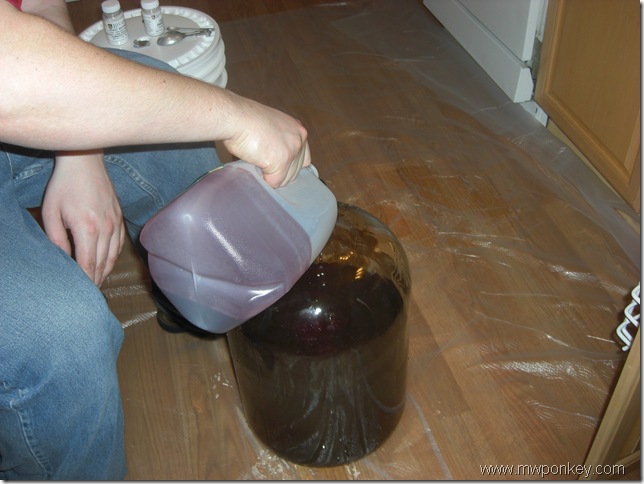
    Step #3: When you’ve added all your honey, you can pour in the rest of your water. At this point in a traditional mead, we would skip ahead to step 4, but when mixing a melomel mead, this is where you would add your fruit, as seen below:

    Adding the Fruit

    Rinse with distilled water…

    Distilled Water Rinse

    And repeat until you get all the fruit…

    All the fruit added...

    I use 100% natural purees for a few reasons:

    1. Dollar for dollar you get the most fruit for your money.
    2. There is no chance of contamination (bad fruit, bugs, pesticides).
    3. There are no skins or fruit husks to skim/strain from the mead.

    …but to each their own.

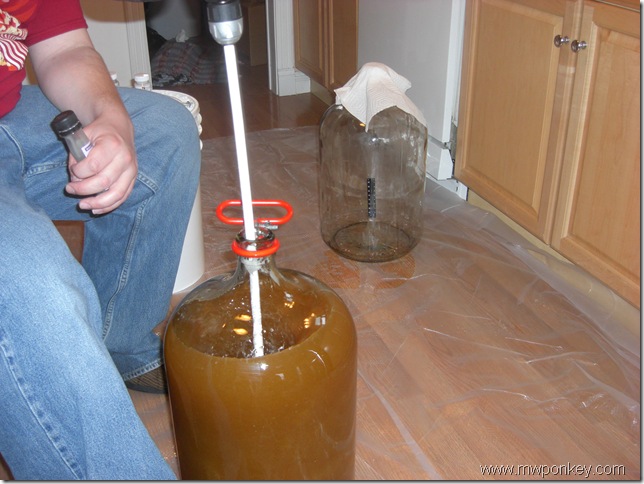
    Step #4: Once this step is complete, it’s time to oxygenate your mead, or what’s known as “frothing your must”…no joke. Basically what you’re doing here is mixing the ingredients while introducing large amounts of oxygen into the mix, which is very key in giving your yeast a good start in fermentation.

    [youtube=http://www.youtube.com/watch?v=D1mekuvBf88&w=640&h=390]

    Notice how towards the end of the video, the agitator is pulled up and out and then reversed to really allow the air to get into the mead.

    Step #5: Once this is completed, it’s time to add the yeast:

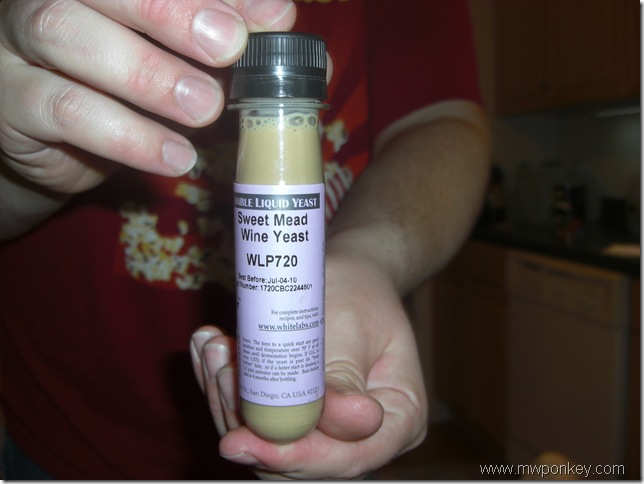
    Liquid Yeast

    The yeast pictured above is known as liquid yeast (for obvious reasons). It is better in ways for a mead beginner because it’s pre-mixed, and all you really need to do is shake vigorously and pour in. However, it does have a significantly shorter shelf life than its dry counterpart, so decide which is best for your tastes.

    Below is the dry yeast being added after preparation (all dry packets have preparation instructions, so follow them very carefully).

    Adding the dry yeast mixture

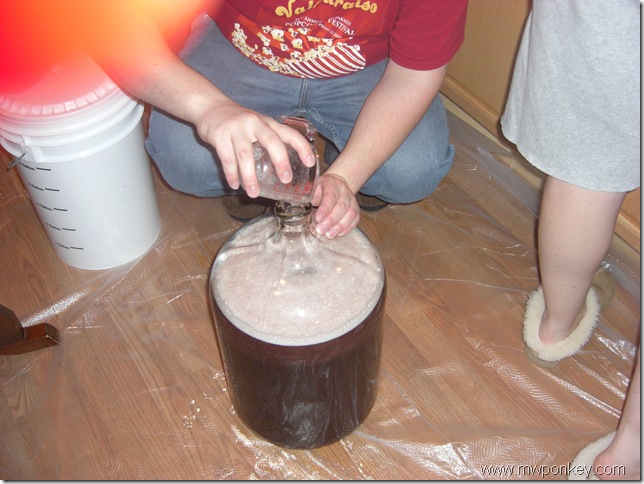
    Once you have added your yeast, agitate one last time…

    Mixing in the yeast

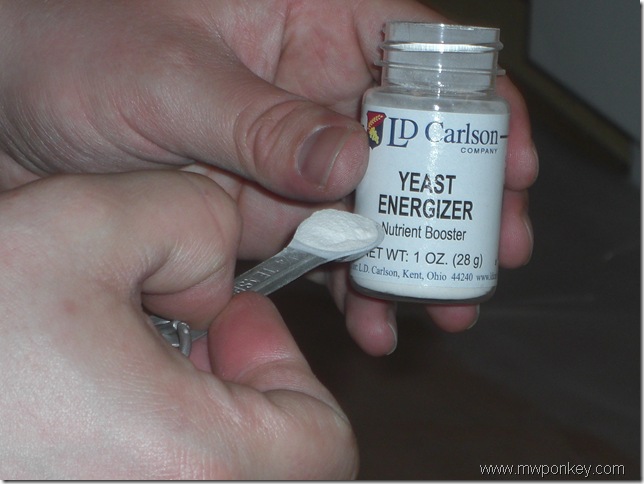
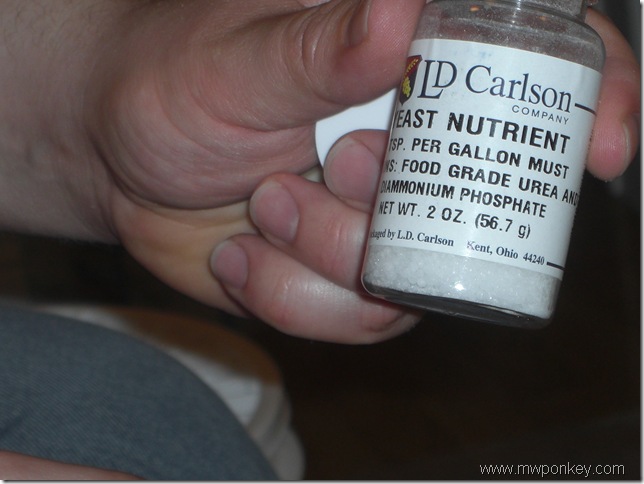
    Step #6: Finally, add your yeast energizer and nutrient. Each should have mixing directions. These are both very valuable additives to your mead, as they will both kick start your yeast into action, but also provide the yeast with enough nutrients to fully complete fermentation without dying off too early.

    Yeast Energizer (1 tsp per gallon of must)

    Yeast Nutrient (1 tsp. per gallon of must)

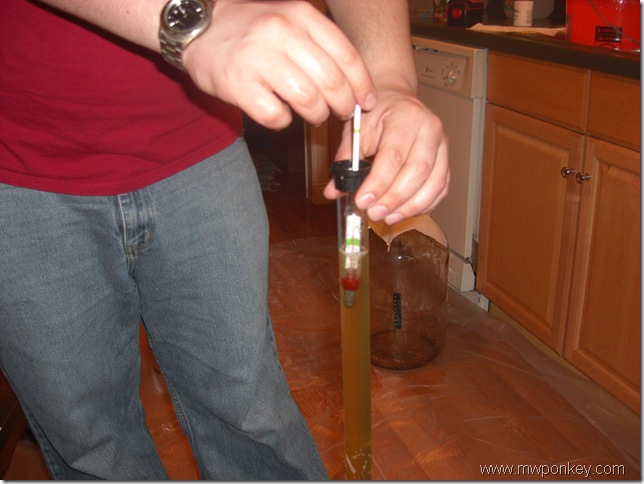
    Step #7: After this final ingredient, agitate your must one more time. Use the wine thief to grab a sample of your mead for a specific gravity test. You need to get a initial and final specific gravity to determine the approximate alcohol content of the mead. The hydrometer should have a chart and instructions for determining alcohol content.

    Specific Gravity

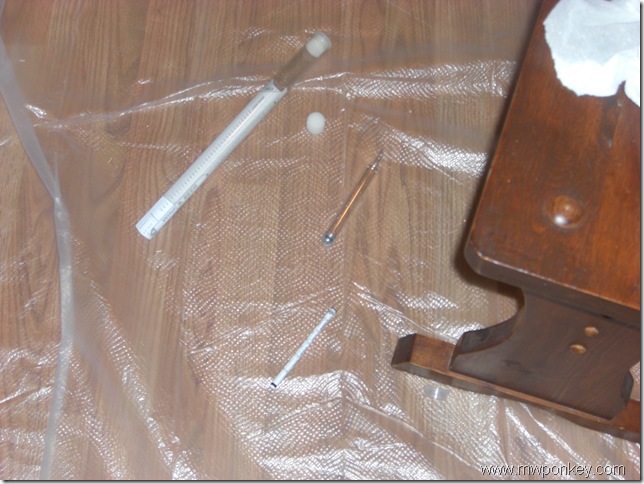
    Unfortunately, I wasn’t able to get an accurate read on the initial specific gravity because I am a dumbass and dropped my hydrometer.  Instead, I tried to use a fish tank hydrometer (for measuring SG of salt water tanks) to get a read, but it was very inaccurate.

    Broken Hydrometer :(

    Step #8: Remove the stopper and airlock from the sanitization bath and insert into the top of your carboy. Be sure to fill the airlock with water to the designated line, and also be sure to check on the water level as fermentation goes on, to make sure there is enough water to keep the airlock.

    Airlock and ready to go

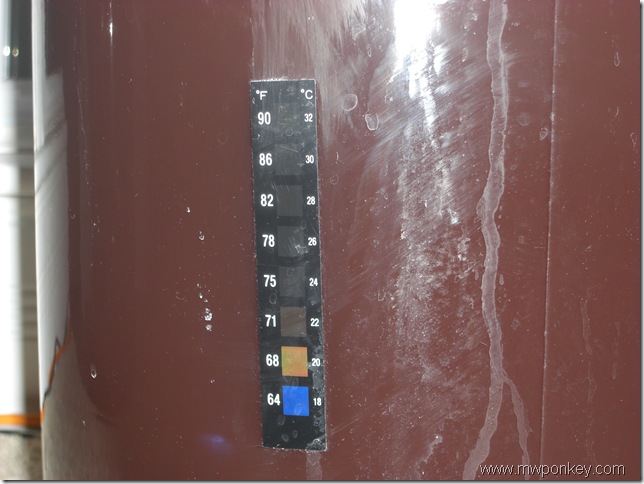
    And that’s it! Be sure to keep your mead in a place that is 70° – 75°F, as this is the optimum temperature for fermentation. On-glass aquarium thermometers (the kind you see on fish tanks) come in handy for tracking the temperature of your must.

    Temperature

    Keep your mead someplace with a decent amount of light and average room temperature.

    Finished

    Within 24-48 hours you should see fermentation as seen in the below video. This can last somewhere between one to three months depending on which strain of yeast used.

    [youtube=http://www.youtube.com/watch?v=KU8oc1fY7hs&w=640&h=390]

    If you have any questions, feel free to email me. Thanks go out to Thomas Merritt for helping my put together these two wonderful specimens; it really does help having a partner to brew with.

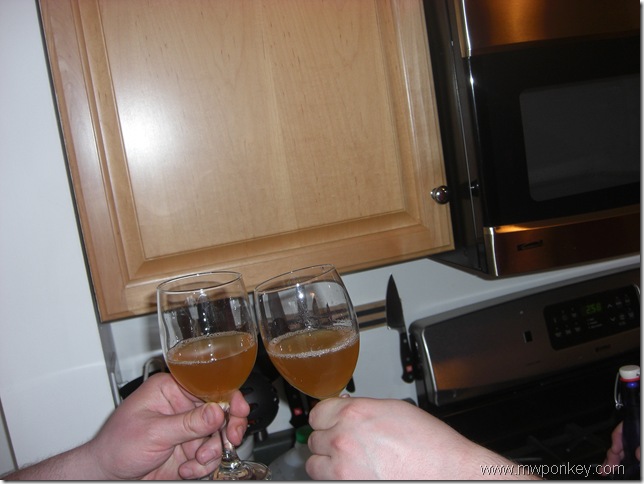
    Cheers!

    Cheers!

    Used with permission from Matt Ponkey.  You can find the original post at http://www.mwponkey.com/2010/05/brewing-mead-part-2-starting-your-mead.html.  Contact the author to obtain permission for republication.
  • Alice in Wonderland

    Last weekend, Adrian and I attended the wedding of our friends – Drink Matron contributor, Matt Ponkey and his lovely bride, Andi. Adrian was a groomsman, and I had the honor of reading a poem during the ceremony.  It was beautiful, and we had an amazing time.

    There was also plenty of imbibing, and, if my phone had been functional at all during the weekend, I would have posted some bar and drink pictures.  There were plenty of Drink Matron worthy moments.

    I was particularly impressed with a drink that our friend Chris was sipping on after the ceremony.  He called it an Alice in Wonderland, and I am happy to say that it indeed tasted like the trippy tale.

    The drink is composed of equal parts Southern Comfort, Amaretto (our bartender used Disaronno), and Grand Marnier.  Each of the ingredients does an amazing job of showing itself while complimenting the others.  While this drink should be sipped slowly (it is, after all, 100% liquor) it is surprisingly refreshing.  I liked it instantly.

    Unfortunately, I’m still working on getting a liquor collection together, and I don’t have any of the ingredients to make one myself and really enjoy it.  I look forward to trying it again.

    Alice in Wonderland

    • 1 part Southern Comfort
    • 1 part Grand Marnier
    • 1 part Amaretto

    In an old-fashioned glass, combine the ingredients over ice.  Garnish with a cherry or orange slice.  Enjoy.

    Copyright of Drinkmatron.com.  Contact website admin to obtain permission for republication.
  • Brewing Mead #1: Before you start

    Guest Post by Mead Extraordinaire, Matt Ponkey

    In any project, the key to a successful outcome is proper preparation, and making mead is no different. Properly preparing both your ingredients and equipment can easily mean the difference between sweet success and bitter failure…literally. So here are some things to consider before you ever start your batch of mead:

    Honey: The Main Ingredient
    The first thing you need to do when making mead is determine what kind of mead you want to make, as there a many variations.

    The simplest of these is a “Traditional” mead, which is a basic honey wine with the main and only real ingredient being honey. There are other variations of mead that I will get into later, however in every recipe, honey is your main ingredient.

    Because it is your chief ingredient, it is important that you choose a high quality honey, as this is where your mead will get all of its flavor. The general rule of thumb for honey is the less processed (and therefore more opaque) it is, the stronger and more pronounced the flavor. Take into consideration the type of honey your dealing with, as there are many many variations, and therefore, many many flavor profiles.

    Honey is usually named after the type of flower that the bees use to pollinate, and there really is no right or wrong type of honey for your mead, it’s all about your personal taste. Try to purchase your honey from local producers, as that is where you will likely find the highest quality, however if you live in an urban area and are unable to find a local producer, there are many websites that sell high grade honey.

    Yeast – The Grunt Labor
    Just as important to the flavor of your mead as honey, choosing the right type of yeast for your taste and mead type will make all the difference. The problem with yeast is there is no right or wrong answer, it’s all about your personal taste. Do some research on the internet and read what others have said about what types of yeast form what types of flavors. Some yeasts have a higher alcohol tolerance than others, while some can make your mead dry, others will add a sweet flavor. Your best bet is to read up on this before making a purchase.

    Equipment: The Staging Ground
    The easiest way to get the correct equipment for your first batch of mead is to buy a pre-assembled kit from a brewing supplier. This will ensure you have all the tools you need for your brew. I personally use Midwest Brewing and Winemaking Supplies. They have pretty much anything you could ever need, and their prices are competitive. If you want to patch together your own kit, you need the following basic equipment:

    * Carboy or Food Grade 5-Gallon Bucket
    * Sanitizing Agent
    * Air Lock
    * Distilled Water
    * Yeast Nutrient
    * Yeast Energizer

    Extras: Make it Your Own
    This is the part where you can get creative. Adding fruits and/or spices to your mead can drastically change its profile. Be certain that your yeast is suited for the type of fruit or spice that you are going to be adding. I won’t be detailing this part very much, because the combination’s are pretty extensive, but I have added some links at the bottom of this post for reference, and they contain some pretty solid information about things you can add in.

    Research: The Key to Success
    Whether it’s online or in print, researching your recipe and ingredients beforehand is the single best thing you can do to ensure the success of your mead. Below are some useful links:

    * Wikipedia: Mead
    * GotMead – Good reference for recipes
    * The Compleat Meadmaker – The reference book I use

    I have decided to make two different types, a Traditional style mead, and Melomel style mead.

    Let’s get started!

    Used with permission from Matt Ponkey.  You can find the original post at http://www.mwponkey.com/2010/03/brewing-mead-part-1-before-you-start.html.  Contact the author to obtain permission for republication.