Blog

  • Drinkmatron Labs: Hard Cider

    When it comes to homebrewing, the absolute easiest thing you can make is hard cider.  In this day and age where apple cider is readily available from apple orchards all over (or from a grocery store if you have to), you can get a batch fermenting in 5 minutes.  A lot of apple orchards sell freshly pressed apple cider without any preservatives added and ideally this is the cider you want to use.

    The preservatives added to juice is called potassium sorbate, and its only job in the world is to prevent yeast from reproducing.  Just in case any wild yeast makes its way into your cider, it won’t ferment so quickly and the cider will “last” longer.  It can’t stop the yeast from fermenting the sugars in the cider, it just stops them from being able to multiply.

    So you want to avoid cider with preservatives.  If you don’t live anywhere near an orchard that sells preservative-free cider, fear not, because you can still make it work.  You just need more yeast. The orchard I went to only sold cider with preservatives so I had to go this route.

    To make cider, you need:

    * Cider
    * Yeast (any brewing yeast, you can find it at your local home brew store or most Co-Ops)

    Put the cider in some kind of container that you can ferment it in.  The jug it came in will work fine as long as you can put together some sort of airlock system in it to prevent contaminants from getting in and the bottle from getting pressurized.  Add the yeast to the cider.  Wait for several months.  If you want it carbonated, mix a little table sugar in with the cider and place in pressurized bottles (like old pop bottles).

    If you’re like me and are using cider with potassium sorbate, you need more than just a packet of yeast.  Since it won’t multiply, you need to start with all the yeast possible.  I used three packets of champagne yeast.  On top of that, I made a yeast starter using some briess dry malt extract and yeast nutrient to get the yeast amped up and ready to ferment my cider.

    Now it’s just a waiting game for some tasty, tasty hard cider.

    ** Note: In Co-Op’s and grocery stores you will find a product called “Brewer’s Yeast.”  This is not what you want to use, this is dead yeast that won’t activate or ferment.

  • How to Mix an Old Fashioned

    Brandy or Whiskey, sweet or sour, making an old fashioned is as simple as the ingredients that go into it. Read on and learn ways to make this barroom favorite.

    Possibly the first drink to be called a cocktail, the old fashioned was most likely invented in the late 1880s by a bartender at the Pendennis Club in Louisville, Kentucky. The drink was simple: combine some bourbon, bitters, sugar, water and ice and bang, you’ve got yourself a drink.

    To mix a classic old fashioned you will need:

    • 2 ounces of bourbon whiskey
    • 2 dashes of bitters
    • 1 cube of sugar with a splash of water, or simple syrup
    • 3 cubes of ice
    • Old Fashioned (or rocks) glass

    In an old fashioned glass, combine the cube of sugar, water and bitters (or simple syrup and bitters). If needed, crush the sugar mixture to coat the bottom of the glass. Add the cubes of ice and whiskey. Garnish with a twist.

    Served in a glass named for itself, the old-fashioned is enjoying a resurgence in popularity, along with many of its classic compatriots. Options to making the drink are as long as its century existence, but debates on keeping the purity of the drink often negate the tasty variations.

    For most purists, the drink remains what it has always been, a whiskey cocktail with the minimum additions made. For others who enjoy a new take on an old favorite, adding a wash of sweet or sour (or in many cases soda water), mixing brandy instead of whiskey, or an added slice of orange garnish or a maraschino cherry make the drink that much more interesting. The decision, however, is always up to the drinker, to play around with the recipes and find what truly works for you.

    The following recipe has been popularized in the north central region of Wisconsin. Known as a whiskey (or brandy) old fashioned sweet (or sour), it is just one take on what has become known as Wisconsin’s state drink.

    To mix this version you need will need:

    • 2 ounces of whiskey or brandy
    • 2 dashes of bitters
    • 1 to 3 ounces of sweet or sour wash
    • 1 cube of sugar with water, or simple syrup
    • orange slice or cherry garnish (optional)
    • 3 cubes of ice
    • Old Fashioned (or rocks) glass

    In an old fashioned glass, combine the cube of sugar, water and bitters (or a splash of simple syrup and bitters). If needed, crush the sugar mixture to coat the bottom of the glass. Add the cubes of ice and your choice of whiskey or brandy. Top with sweet or sour wash and garnish with an orange slice or cherry. Sit back and enjoy!

  • Brandy colored memories

    When I was a kid, my mom drank Brandy. It sticks out in my mind – the bottle of E&J on the counter, waiting until the next time people came over to the house. I remember the smell of it – she drank it mixed with water – the sweet, dry aroma of the Brandy mixed with the wet coolness of cold well water and ice cubes.

    Because of this, Brandy holds a special place in my heart. Not that I drink it myself. While as a child that smell marked special occasions and visits from beloved aunts and uncles, as an adult I’ve never had much of a taste for overly potent flavored boozes. However, when the cooler months roll around and it’s time for seasonal warmers like the Tom and Jerry, and Christmas treats of Brandy soaked chocolate covered cherries, I’m reminded just how comforting this lovely spirit can be.

  • The Sidecar

    Of all the basic drinks listed in David A Embury’s Fine Art of Mixing Drinks, the Sidecar has the most dubious of back stories.


    Paris

    It is said that in Paris during World War I, an American Army captain often traveled around in a motorcycle sidecar. One day, when he was under the weather, he requested a libation that would help him to feel better. The bartender, trying to find something suitable to pair with the “medicinal” brandy, added Cointreau and lemon juice as a source of Vitamin C. The drink was named “Sidecar” as a tribute to its original patron, and the rest is history.

    London’s Buck’s Club

    Many believe that the Paris story is a very big myth, and that the true invention of the Sidecar can be traced back to the London’s famous Buck’s Club in the 1920s. The creation is most often credited to Pat MacGarry, one of the Buck’s Club’s most popular bartenders.

    Or Not

    Another possibility is that the Sidecar is itself a variation of the Brandy Crusta, a cocktail made with the same ingredients and which also sported a sugar rimmed glass. The most notable difference is that the Sidecar is made with Cognac rather than standard Brandy.

    French School vs. English School

    While the origin of the drink may not be of any consequence to the drinker, the exact proportion of what goes into the drink may be very important. While everyone agrees that the three main ingredients are Cognac, Cointreau and lemon juice, the debate about just exactly how much of each goes into the drink has spawned two schools of thought: the French School and the English School.

    The French School maintains that the drink should consist of equal parts of each of the three ingredients. The English School believes that the cocktail should consist of two parts Cognac for every one part Cointreau and lemon juice. While this may not seem like it should make a difference, the taste of each of these mixes is drastically different, and can cause quite an issue when a you’re expecting your drink to taste a specific way.

    The Sidecar

    French School

    • 1 oz Cognac or Armagnac
    • 1 oz Cointreau
    • 1 oz Freshly squeezed lemon juice

    English School

    • 1 1/2 oz Cognac or Armagnac
    • 3/4 oz Cointreau
    • 3/4 oz Freshly squeezed lemon juice

    Combine ingredients in a shaker half full of ice. Shake until very cold, and strain into a cocktail glass (preferably chilled). If preferred, rim the cocktail glass with sugar before straining. Garnish with a twist of lemon or orange.

    No matter how you like your Sidecar, it’s certain that what you’re getting is something classic and pleasant. Please remember to always drink responsibly and know your limit.

  • Anchor Steam Beer

    Steam beer is an interesting style of beer and, as far as I know, Anchor is the only company that still makes it.  This beer has a nice hazy, amber color that makes you think this beer is going to be a medium to full bodied beer.  But that’s the trick, it’s actually incredibly light bodied.  It has almost an airy quality to the taste that is surprisingly dry.  The taste also drops off very quickly leaving almost no finish at all.

    If you want a beer with a load of flavor, this is not the beer for you.  If you’re looking for a crisp, refreshing beer to quench your thirst on a hot summer day, this is definitely the beer for you.

    On a 100-point scale, I give this beer 90 points.  I like the beer, but having no finish is kind of off putting to me.  I can see why people might rate this higher than me, I just like fuller bodied beers more than the lighter beers.

  • Sierra Nevada Tumbler Autumn Brown Ale

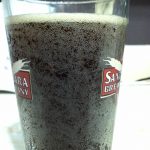
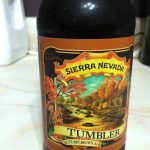
    The coming Autumn time is a signal for us beer drinkers that it’s time to start stocking up on the darker beers that seem to go oh-so-well with the colder weather.  This year, Sierra Nevada brewery has supplanted their usual fall seasonal beer with Tumbler Autumn Brown Ale.  The label design screams Fall Beer with its vibrant oranges and yellows.  It’s almost as if the bottles are whispering “Pick me!  Take me home with you!” from the beer cooler.  They’re very compelling.

    I drank my first bottle of it directly from the fridge, which in hind sight was a mistake.  I was disappointed in how remarkably average this beer was.  No aroma, very little stuck out in the taste, finish was unremarkable.  But then I thought “Hey!  It’s a fall beer, why not drink it at room temperature?”  So I left a bottle sitting in the pantry until it had reached room temperature and cracked it open.

    The aroma coming from the beer was still really faint.  I must have looked like a crazy person, sticking my nose in my glass and huffing beer for 5 minutes trying to glean any kind of distinct smells.  There was the faintest hint of apples that was gone almost before it presented itself.  There was a nutty kind of aroma with a syrupy, almost caramel, sweetness that wafted in.

    When I finally drank it, I could definitely taste a malty, toasty flavor.  I was very surprised at how smooth this beer was.  It just slides down your gullet like it’s going for a nice leisurely stroll.  There was a very subtle sweet taste – like caramel.  Again, I got the distinct impression that I tasted apples, but it was so subtle that I’m not sure I wasn’t making it up.  After a couple sips I got the visualization of eating a biscuit with a slice of McIntosh apple drizzled with warm caramel.  The aftertaste was a little buttery and nutty, but it wasn’t a long finish.

    Tumbler has a thick presence on the mouth for a medium bodied beer, and an impressively short finish.

    All in all, I felt this beer was okay, but I don’t think I’ll buy it again.  On a 100-point scale, I’d give it 84 points.

  • Spent Grain Bread Recipe

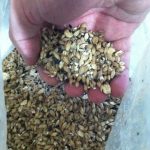
    Last weekend I started home brewing again.  Being that I brewed an all-grain batch, I had a concern early on about what to do with the spent grain.  When you brew all-grain beer, all that grain you used in the process ends up being a waste product after all the starches are washed out.  So what can you do with that grain once its spent?  You could throw it on a compost heap to add some nutrients to the dirt, or you could make some seriously kick ass bread!

    I looked around online and found a recipe for it.

    • 3 cups all-purpose flour
    • 1 cup whole wheat flour
    • 1/4 cup sugar
    • 2 tsp baker’s yeast
    • 2 tsp salt
    • 3 cups spent grain (ground up)
    • 1 egg (beaten)
    • 1 cup milk
    • 1/4 cup butter or olive oil

    Mix the dry ingredients, add the wet ingredients, knead, put in an oiled bowl and let it rise for ~90 minutes, punch down and put in an oiled bread pan, let rise until doubled, bake for 40 minutes at 350F, let cool for 30 minutes.

    This recipe makes 3 loaves, which is WAY more than we here at DM Labs will eat in a week and if you do the math, 3 cups of spent grain isn’t nearly all the spent grain you will have after a batch of brew.  Thankfully, bread dough freezes well for later baking.  I used up all the flour I had in my house and almost used up all of my spent grain making dough for 12 loaves of bread (all frozen now), and I froze the remaining cup or so of spent grain I have for when I restock my ingredients.

    I was expecting this bread to be run of the mill, home-baked bread, but it turned out far greater than I imagined.  This is seriously some of the best bread, commercial or homemade, that I’ve ever had.  We devoured the first loaf in just under 24 hours.

  • Beer Review: Schlafly Pumpkin Ale

    “I would rather sit on a pumpkin, and have it all to myself, than be crowded on a velvet cushion.” — Henry David Thoreau

    Reinheitsgebot be damned!  One of the beer styles that has been picking up steam over the last few years has been Pumpkin Ale.  This autumn is the first time I’ve ever sampled a commercial pumpkin ale and it was actually under the recommendation of a friend of mine.  The beer in question is Schlafly (+1 internets if you can teach me how that’s actually pronounced) Pumpkin Ale.  The first thing I noticed about this beer was that they actually use pumpkin in the beer.  A disappointing realization I came to earlier this year was that most “pumpkin” beer doesn’t actually contain any pumpkin, just the spices that make you think of pumpkin.

    After the beer is in the glass, you can just tell it’s a pumpkin ale.  It has this luscious, orange-hued brown color that makes me think I see the toothy grin of a jack-o-lantern in the glass.

    I was a little wary after I smelled this beer, the smell of pumpkin, cinnamon, and nutmeg cut through the beer and was almost overwhelming.  I was afraid that the flavor would be cloyingly sweet and taste more like a soda than a beer.

    I’m relieved to say I was wrong.  Initially it’s sweet, and you can definitely taste the pumpkin and spices, but it doesn’t last.  It’s a full bodied, viscuous beer but without feeling too heavy.  The finish is dry enough to balance out the initial sweetness, making for a well rounded beer.

    Overall, I really like this beer.  I’ll happily pick up a six-pack if I see it, though this stuff sells like hotcakes so it’s pretty rare to find one in the wild.  This is a complex enough beer that I can only drink 1 or 2 before I need to change it up, but still a very delicious drink.  On a 100-point scale, I give it 98 points.

  • Drinkmatron Labs: Get Off My Lawn (version 1) Brew Day

    This week marks a special occasion in the history of drinkmatron.prjct.info.  We finally got Drink Matron Labs off the ground with our first experimental batch of beer: Get Off My Lawn Old Ale.

    So we sat down on Saturday evening, cracked open some tasty beers and got started brewing.  GOML is an all-grain beer, so we had to mash the grains.  This was the first time I’ve ever done an all-grain beer and didn’t have anything remotely resembling a mash tun to mash the grains in.

    Enter the Australians

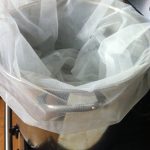
    I style of mashing has become hugely popular on the Australian homebrew scene called Boil In A Bag (or BIAB) where you essentially steep the grains in 150ish degree water for around an hour to activate your enzymes.  This is convenient because you don’t need a separate vessel from your boil kettle and the grain is enclosed in a big bag that you can easily pull out of the kettle and do as you please with.

    Unfortunately, you need to keep a constant eye on your temperature and wrap your kettle several blankets to keep your mash at the appropriate temperature.  By the end of my mash schedule, my mash had cooled down to 140 degrees, which is not terrible, but not ideal either.

    In the end, we locked it away inside Mr. Beer and let that yeast get to fermenting.  Stay tuned to hear how it turned out.

  • What is Oktoberfest Beer?

    When people refer to Oktoberfest beer, they are referring to one of two things. In the first case, they refer to any beer that is brewed within the city limits of Munich, Germany.  After the Club of Munich Brewers have decided to deem it as such, the beer is referred to from that point forward as an Oktoberfest Beer.  The important point of distinction here is that it is a beer that is authorized to be sold at Oktoberfest, the single largest beer festival in the world (serving over seven million liters of beer in roughly 16 days).

    The second reference is actually a misnomer for a beer style called Märzen.  Märzen is a bavarian lager that is commonly served at Oktoberfest (hence the confusion), but all Märzens are not Oktoberfest beers, nor are all Oktoberfest beers Märzens.  There is an interesting story behind Märzenbier.  Back in 1536, the Bavarian government outlawed beer brewing between 23 April and 29 September because there was an increased risk of starting the countryside on fire during the warm, dry summer months.  So brewers had to develop a beer style that they could make large quantities of that would keep through the summer.  They came up with Märzen and would work overtime in late March and April brewing as much of the stuff as they could, then barreling it and storing it in caves to keep it cool and out of the sun.  Whatever was left at the end of the summer was generally taken to Munich and served at Oktoberfest (or just drank as if the imbibers were at Oktoberfest).  It is usually amber in color and has an alcohol content of 5 to 6.2% with a mild hop profile.